Top 10 Homemade Dog Treat Recipes Your Pooch Will Love

One way to keep our furry friends happy and healthy is by treating them to delicious homemade goodies. That’s why we’ve gathered some of the best dog treat recipes that are not only easy to make but also guaranteed to make your pooch’s tail wag with joy.
So, let’s get those baking pans ready and dive into the top 10 homemade dog treat recipes your four-legged friend will absolutely adore.
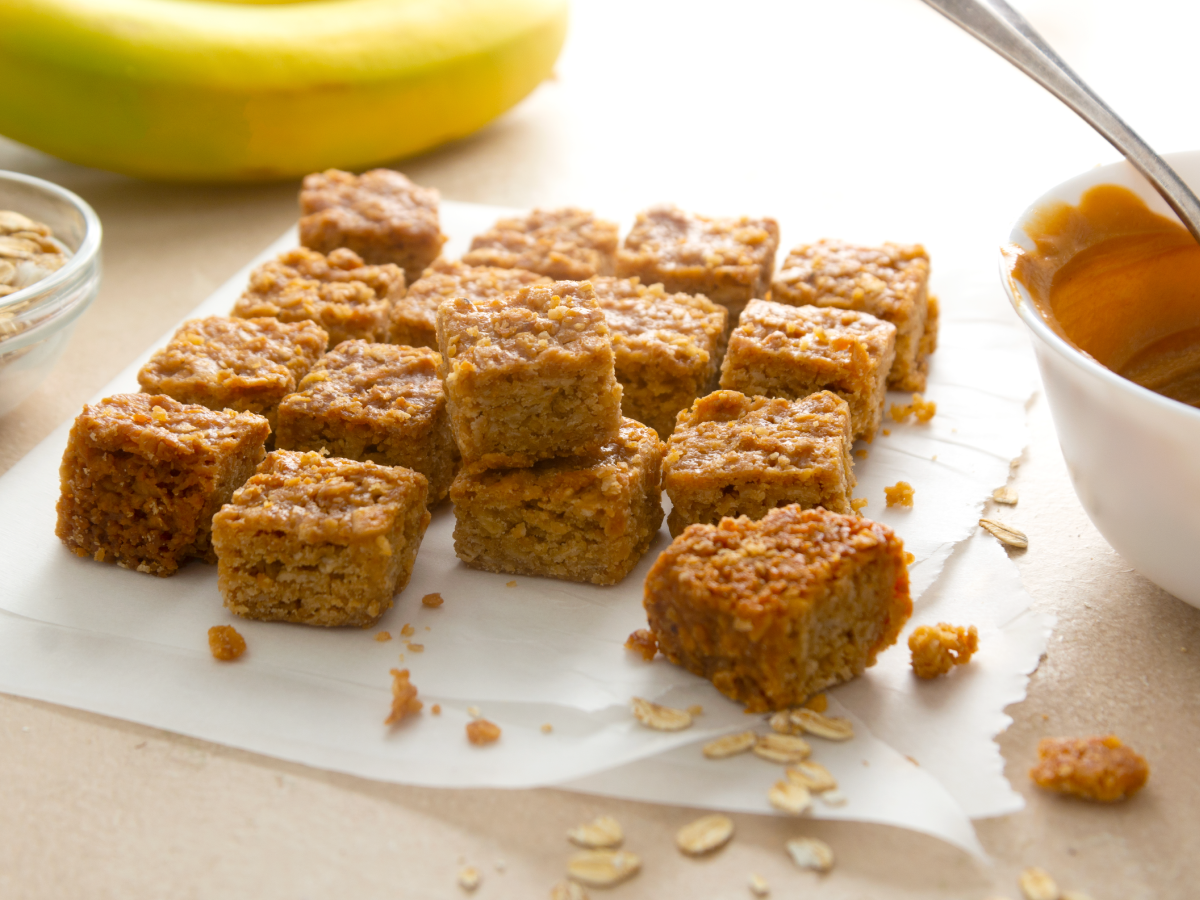
1. Peanut Butter Banana Bites
| Prep Time | Cook Time | Yield |
|---|---|---|
| 15 minutes | 0 minutes | Approx. 20 bites |
Start off on a scrumptious note with these delightful Peanut Butter Banana Bites. Dogs love the combination of peanut butter and bananas, and these treats are a perfect blend of both. Mash up a ripe banana, mix it with a spoonful of peanut butter, and add some oats for texture. Shape the mixture into small balls and bake until golden brown. Your pup won’t be able to resist these drool-worthy treats!
Peanut Butter Banana Bites Ingredients
| Quantity | Ingredient |
|---|---|
| 2 | Ripe bananas |
| 1/2 cup | Natural, unsalted peanut butter |
| 1/4 cup | Plain Greek yogurt (low-fat or non-fat) |
| 1 tablespoon | Honey |
| 1/2 cup | Old-fashioned oats |
| 1/4 cup | Finely chopped carrots (optional) |
| 1/4 cup | Finely chopped blueberries (optional) |
| 1/4 cup | Unsweetened shredded coconut (optional) |
Nutritional Facts (per bite)
| Calories | Protein | Fat | Carbohydrates | Fiber | Sugars |
|---|---|---|---|---|---|
| Approximately 30 calories | 1.5 grams | 1.5 grams | 3.5 grams | 0.5 grams | 2 grams |
Please note that these nutritional values are approximate and can vary based on specific brands and ingredient choices.
Always consult with your veterinarian to ensure the treats are suitable for your dog’s dietary needs and any potential allergies.
Peanut Butter Banana Bites Instructions
- Begin by mashing the ripe bananas in a large mixing bowl until they reach a smooth consistency.
- Add the peanut butter, Greek yogurt, and honey to the mashed bananas. Mix the ingredients together until you have a uniform mixture.
- Gently stir in the old-fashioned oats to create a dough-like consistency. If you choose to include carrots and blueberries for added nutrition and flavor, fold them into the mixture at this point.
- Line a baking sheet with parchment paper.
- Using a teaspoon or your hands, form small bite-sized portions of the mixture and place them on the prepared baking sheet. If you’d like to add an extra layer of flavor and texture, roll some of the bites in unsweetened shredded coconut before placing them on the baking sheet.
- Place the baking sheet in the freezer for about 1-2 hours or until the bites are firm.
- Once the bites are frozen, transfer them to an airtight container or a ziplock bag and store them in the freezer. These treats are meant to be served cold to provide a refreshing and soothing experience for your dog.
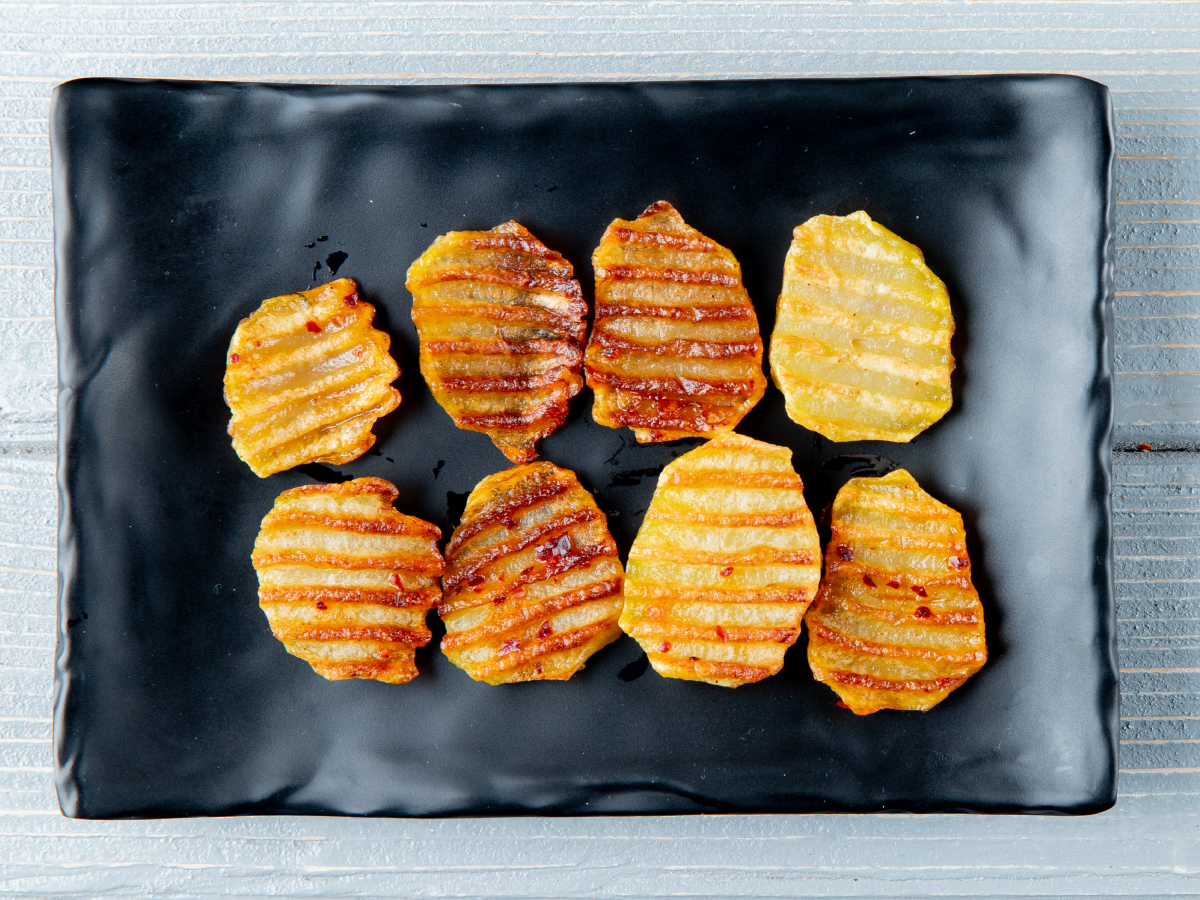
2. Cheesy Sweet Potato Chews
| Prep Time | Cook Time | Yield |
|---|---|---|
| 20 minutes | 3 hours | Variable |
If your furry friend loves cheese, they’ll go crazy for these Cheesy Sweet Potato Chews. Slice sweet potatoes into thin rounds, sprinkle them with a little grated cheese, and bake until crispy. These wholesome chews are not only delicious but also packed with vitamins and fiber. Plus, they make a great alternative to store-bought rawhide chews.
Make grooming a priority, and your furry friend will remain happy, healthy, and looking their best.
Ingredients for Cheesy Sweet Potato Chews
| Quantity | Ingredient |
|---|---|
| 2 large | Sweet potatoes |
| 1/2 cup | Low-fat cheddar cheese, shredded |
| 1 tablespoon | Olive oil |
Nutritional Facts (per chew, for a large sweet potato):
| Calories | Protein | Fat | Carbohydrates | Fiber | Sugars |
|---|---|---|---|---|---|
| Approximately 30-40 calories | 1 gram | 1 gram | 6 grams | 1 gram | 2 grams |
Please note that the nutritional values provided are approximate and may vary based on the size and thickness of the sweet potato chews. Always consider your dog’s size, dietary needs, and any allergies when serving them treats, and provide these chews in moderation. These cheesy sweet potato chews should be given in moderation as an occasional treat and not as a primary food source.
Cheesy Sweet Potato Chews Instructions
- Preheat your oven to 250°F (120°C).
- Wash and peel the sweet potatoes. If your dog prefers a softer chew, you can slice them into 1/4-inch thick rounds. For a chewier texture, cut them into long strips.
- In a mixing bowl, toss the sweet potato slices or strips with olive oil to lightly coat them.
- Arrange the sweet potato pieces on a baking sheet lined with parchment paper, ensuring they are not touching each other.
- Bake in the preheated oven for 3 hours, flipping the pieces halfway through. The sweet potato chews should become dry and slightly crispy. You can adjust the cooking time to achieve the desired level of chewiness.
- While the sweet potato chews are still warm, sprinkle the shredded cheddar cheese over them. The residual heat will help the cheese melt and stick to the chews. Allow them to cool before serving to your dog.
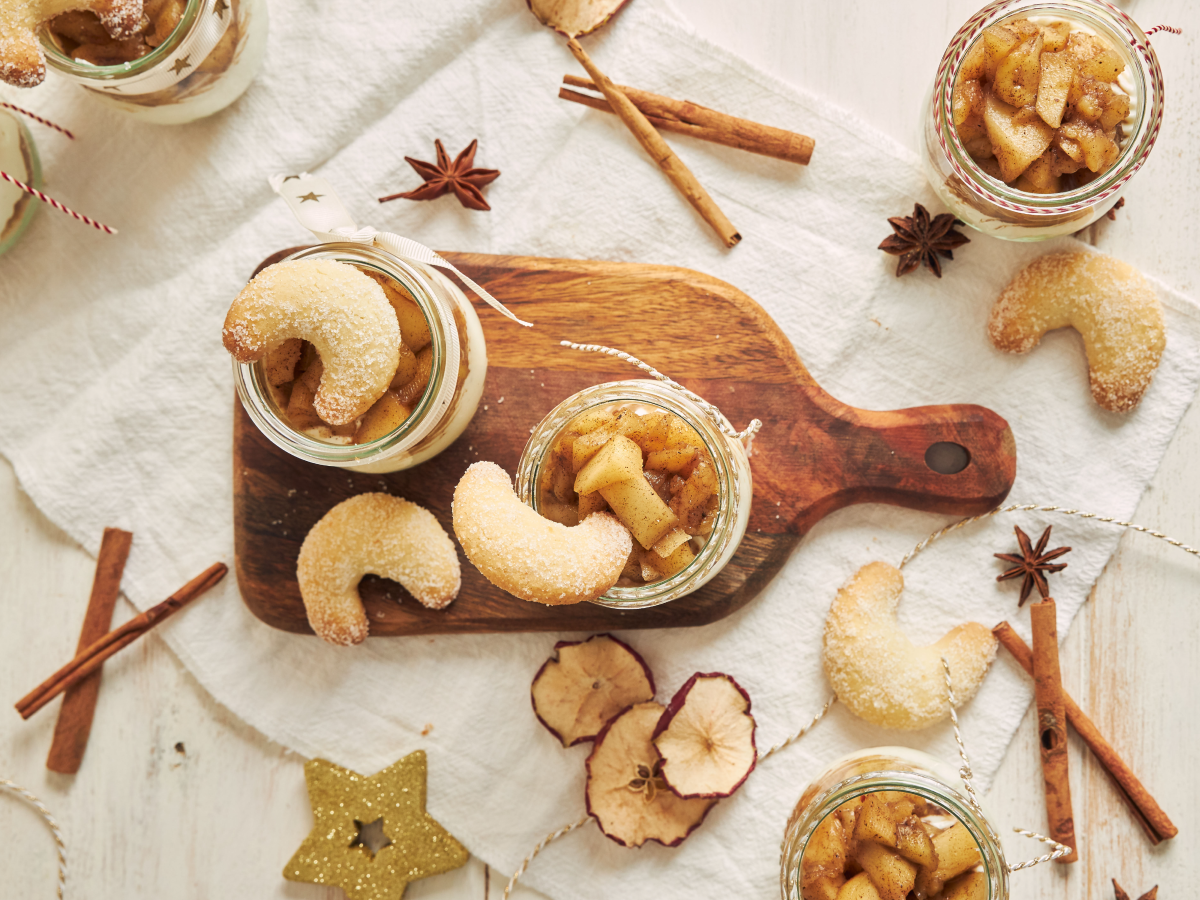
3. Apple Cinnamon Cookies
| Prep Time | Cook Time | Yield |
|---|---|---|
| 15 minutes | 25 minutes | Approx. 24 cookies |
Nothing says “fall” quite like the aroma of apple and cinnamon. Combine grated apple, a dash of cinnamon, oats, and a touch of honey to create these lip-smacking Apple Cinnamon Cookies. They’re perfect for a special treat or even as a gift for doggie friends during the holiday season. The combination of flavors will have your pup begging for more.
Apple Cinnamon Cookies Ingredients
| Quantity | Ingredient |
|---|---|
| 2 cups | Whole wheat flour |
| 1/2 cup | Unsweetened applesauce |
| 1/4 cup | Unsweetened applesauce (for glaze) |
| 1/4 cup | Unsweetened applesauce (for dough) |
| 1/2 cup | Unsweetened dried apple chips, finely chopped |
| 1/2 tsp | Ground cinnamon |
| 1 | Large egg |
| 1/4 cup | Water (adjust as needed) |
| 1 tbsp (optional) | Honey |
| 1/4 cup (optional) | Low-fat plain Greek yogurt (for yogurt frosting) |
Nutritional Facts (per cookie without yogurt frosting):
| Calories | Protein | Fat | Carbohydrates | Fiber | Sugars |
|---|---|---|---|---|---|
| Approximately 30-40 calories | 1 gram | 0.5 grams | 6 grams | 1 gram | 2 grams |
Please note that the nutritional values provided are approximate and may vary depending on the size and shape of the cookies. Always consider your dog’s size, dietary needs, and any allergies when serving them treats. These cookies should be given in moderation as part of a balanced diet.
Apple Cinnamon Cookies Instructions
- Preheat your oven to 350°F (175°C) and line a baking sheet with parchment paper.
- In a large mixing bowl, combine the whole wheat flour, finely chopped dried apples, and ground cinnamon.
- In a separate bowl, whisk the egg, 1/2 cup of applesauce, and honey (if using).
- Gradually add the wet mixture to the dry ingredients, stirring to form a dough. If the dough is too dry, add water a little at a time until it comes together.
- Roll out the dough on a lightly floured surface to about 1/4-inch thickness.
- Use cookie cutters to cut out the desired shapes and place them on the prepared baking sheet.
- For the glaze, mix the remaining 1/4 cup of applesauce with a small amount of water until it has a glaze-like consistency. Brush the glaze over the cookies.
- Bake in the preheated oven for approximately 25 minutes or until the cookies are firm and lightly browned.
- Allow the cookies to cool on a wire rack.
Optional Yogurt Frosting
- Once the cookies have cooled, you can add a yogurt frosting by spreading a thin layer of low-fat plain Greek yogurt on top of each cookie.
- Allow the frosting to set before serving.
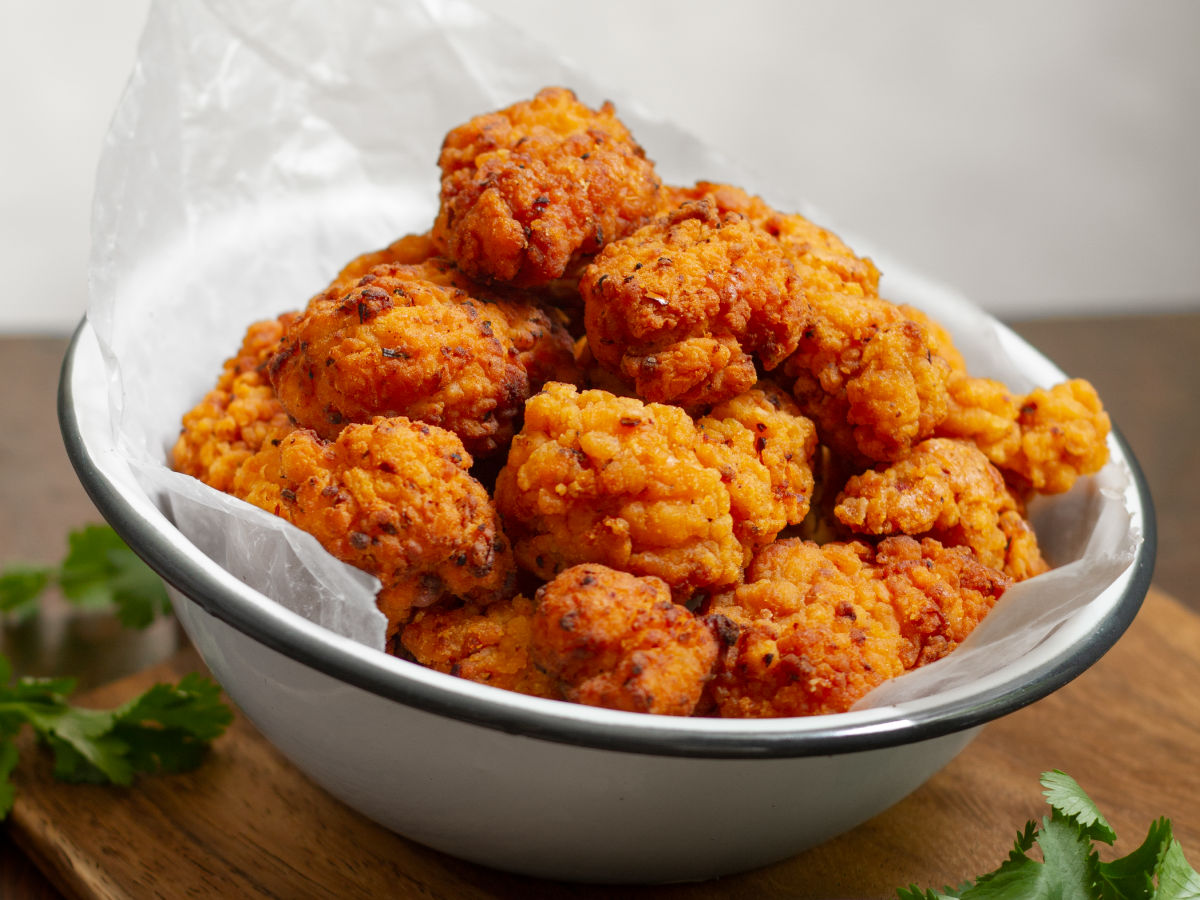
4. Chicken and Rice Balls
| Prep Time | Cook Time | Yield |
| 15 minutes | 20 minutes | Approx. 20 balls |
Is your pup a meat lover? Then these Chicken and Rice Balls will make their taste buds dance. Start by cooking chicken breast until it’s tender, then shred it into small pieces. Mix the shredded chicken with cooked rice, and for an extra burst of flavor, you can add a small amount of chicken broth. Shape the mixture into small balls and bake until they’re crispy on the outside.
Chicken and Rice Balls Ingredients
| Quantity | Ingredient |
|---|---|
| 1 cup | Cooked chicken breast, shredded |
| 1 cup | Cooked brown rice |
| 1/2 cup | Cooked sweet potatoes, mashed |
| 1/4 cup | Peas, cooked and mashed |
| 1 | Large egg |
| 1 tbsp (optional) | Fresh parsley, chopped (for added flavor) |
| 1/4 cup | Low-sodium chicken broth (unsalted, no onions) |
| 1/4 cup (or as needed) | Oat flour (for binding) |
Nutritional Facts (per ball):
| Calories | Protein | Fat | Carbohydrates | Fiber | Sugars |
|---|---|---|---|---|---|
| Approximately 30-40 calories | 2 grams | 1 gram | 4 grams | 1 gram | 1 gram |
Please note that the nutritional values provided are approximate and may vary depending on the size and shape of the balls. Always consider your dog’s size, dietary needs, and any allergies when serving them treats. These chicken and rice balls are a healthy dog treat and should be given in moderation as part of a balanced diet.
Chicken and Rice Balls Cooking Instructions
- Preheat your oven to 350°F (175°C) and line a baking sheet with parchment paper.
- In a large mixing bowl, combine the shredded chicken, cooked brown rice, mashed sweet potatoes, and mashed peas.
- In a separate bowl, whisk the egg and fresh parsley if you’re using it. Then add the egg mixture to the chicken and rice mixture and mix thoroughly.
- Gradually add the low-sodium chicken broth to the mixture, stirring until you have a moist, cohesive mixture.
- Begin forming the mixture into small, bite-sized balls. If the mixture is too wet, add oat flour a little at a time to help bind it.
- Place the formed balls on the prepared baking sheet.
- Bake in the preheated oven for approximately 20 minutes, or until the balls are firm and lightly browned.
- Allow the chicken and rice balls to cool before serving.
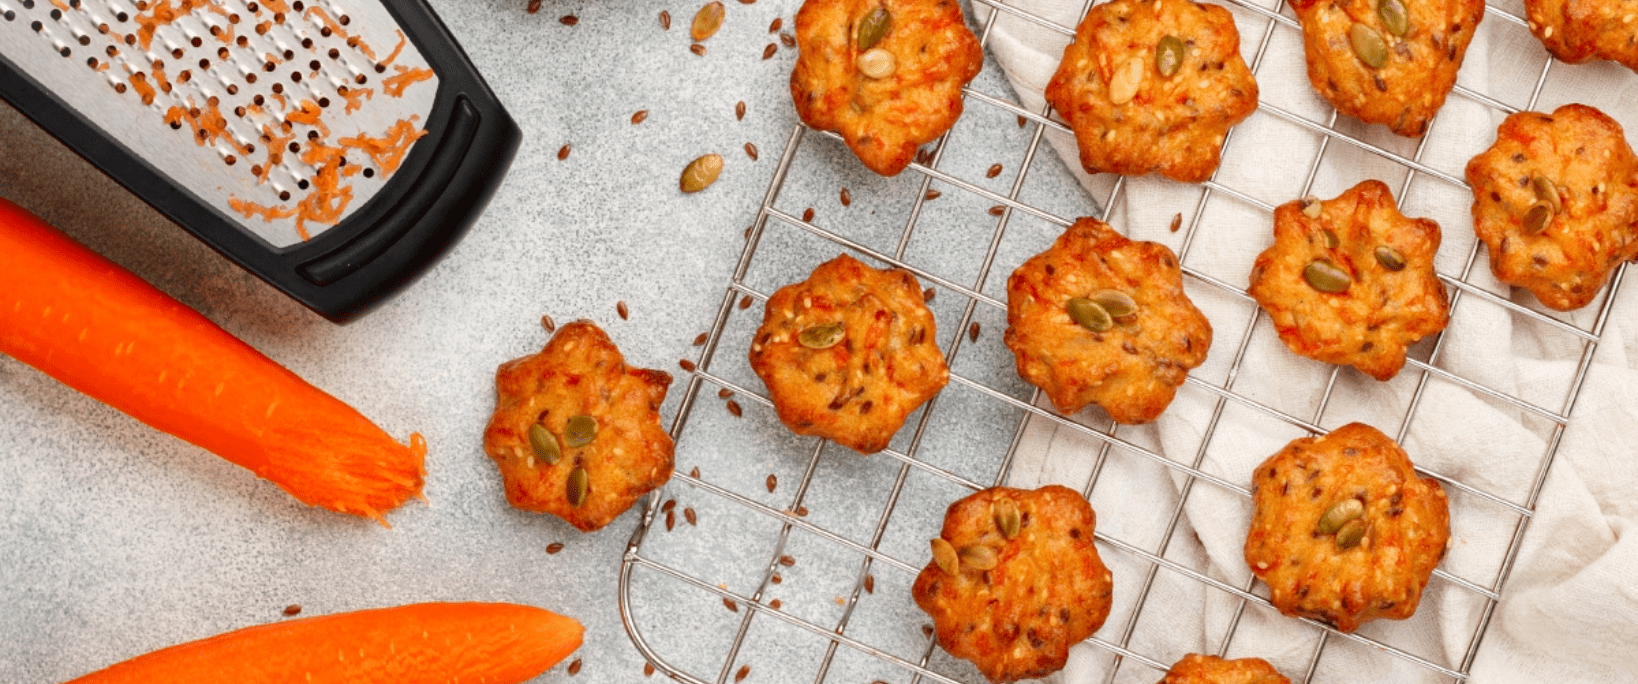
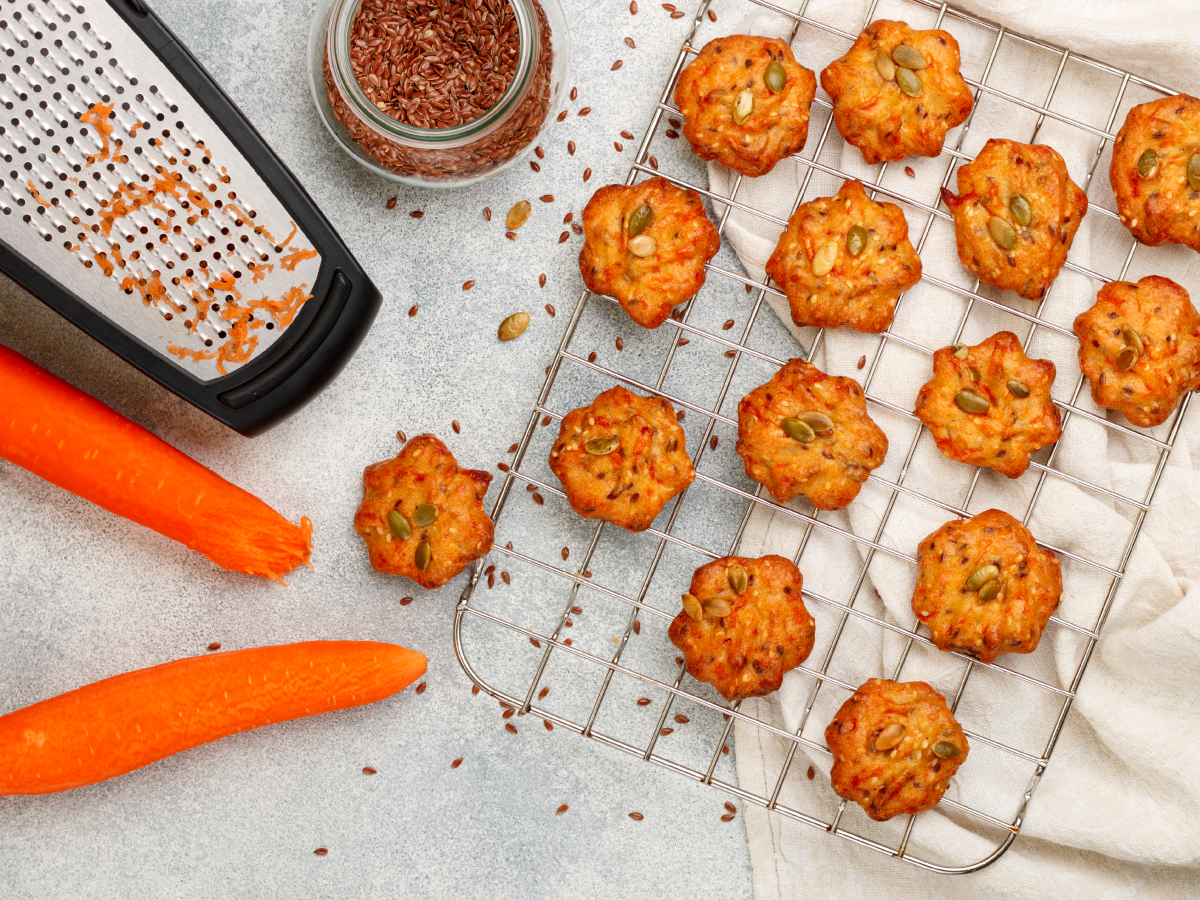
5. Carrot Crunchies
| Prep Time | Cook Time | Yield |
|---|---|---|
| 15 minutes | 30 minutes | Approx. 30 crunchies |
For a healthy and satisfying snack, whip up a batch of Carrot Crunchies. Carrots are not only good for your dog’s teeth, but they’re also loaded with essential nutrients. Grate a couple of carrots, combine them with whole wheat flour, a touch of parsley for freshness, and a tablespoon of honey. Bake until they’re nice and crunchy, and watch your furry friend munch away on these nutritious goodies.
Find out why pet owners love and trust our doggy daycare!
Carrot Crunchies Ingredients
| Quantity | Ingredient |
|---|---|
| 2 cups | Whole wheat flour |
| 1 cup | Grated carrots |
| 1/4 cup | Unsweetened applesauce |
| 1/4 cup | Low-sodium chicken or vegetable broth |
| 1 | Egg |
| 1/4 cup | Rolled oats |
| 1/4 cup (optional) | Finely chopped fresh parsley (for added flavor) |
Nutritional Facts (per crunchie):
| Calories | Protein | Fat | Carbohydrates | Fiber | Sugars |
|---|---|---|---|---|---|
| Approximately 20-30 calories | 1 gram | 0.5 grams | 4 grams | 0.5 grams | 1 gram |
Please note that the nutritional values provided are approximate and may vary depending on the size and shape of the crunchies. Always consider your dog’s size, dietary needs, and any allergies when serving them treats. These Carrot Crunchies are a healthy dog treat and should be given in moderation as part of a balanced diet.
Carrot Crunchies Instructions
- Preheat your oven to 350°F (175°C) and line a baking sheet with parchment paper.
- In a large mixing bowl, combine the whole wheat flour and grated carrots.
- In a separate bowl, whisk together the unsweetened applesauce, low-sodium chicken or vegetable broth, and the egg.
- Pour the wet mixture into the dry ingredients and mix thoroughly. If the dough is too dry, you can add a little extra broth.
- Add the rolled oats and, if desired, the finely chopped fresh parsley to the dough for added flavor.
- Roll out the dough on a lightly floured surface to about 1/4-inch thickness.
- Use cookie cutters or a knife to cut out shapes for your crunchies.
- Place the cutout crunchies on the prepared baking sheet.
- Bake in the preheated oven for approximately 30 minutes or until the crunchies are firm and lightly browned.
- Allow the Carrot Crunchies to cool before serving.
6. Pumpkin Pupcakes
| Prep Time | Cook Time | Yield |
|---|---|---|
| 15 minutes | 25 minutes | Approx. 12 pupcakes |
Who says dogs can’t enjoy cupcakes too? Treat your pooch to these adorable Pumpkin Pupcakes. Combine canned pumpkin, whole wheat flour, eggs, and a pinch of cinnamon. Bake the batter into mini cupcakes, and for a doggie-approved frosting, decorate with a dollop of plain yogurt. These pupcakes make a fantastic homemade birthday treat or a special reward for good behavior.
Pumpkin Pupcakes Ingredients
| Quantity | Ingredient |
|---|---|
| 1 cup | Whole wheat flour |
| 1/2 cup | Rolled oats |
| 1 tsp | Baking powder |
| 1/2 tsp | Ground cinnamon |
| 1/2 cup | Canned pumpkin (unsweetened, pureed) |
| 1/4 cup | Unsweetened applesauce |
| 1/4 cup | Honey |
| 1/4 cup | Water |
| 2 | Eggs |
| 1/2 cup | Shredded carrots |
| 1/2 cup | Shredded zucchini |
| 1/4 cup (optional) | Low-fat plain Greek yogurt (for frosting) |
Nutritional Facts (per pupcake without frosting):
| Calories | Protein | Fat | Carbohydrates | Fiber | Sugars |
|---|---|---|---|---|---|
| Approximately 70-80 calories | 2 grams | 1 gram | 14 grams | 2 grams | 6 grams |
Please note that the nutritional values provided are approximate and can vary based on the size of the pupcakes. Always consider your dog’s size, dietary needs, and any allergies when serving them treats. These Pumpkin Pupcakes are a healthy dog treat and should be given in moderation as part of a balanced diet.
Pumpkin Pupcakes Instructions
- Preheat your oven to 350°F (175°C). Line a muffin tin with cupcake liners or lightly grease the muffin cups.
- In a mixing bowl, combine the whole wheat flour, rolled oats, baking powder, and ground cinnamon.
- In another bowl, mix together the canned pumpkin, unsweetened applesauce, honey, water, and eggs.
- Pour the wet ingredients into the dry ingredients and stir until well combined.
- Fold in the shredded carrots and zucchini.
- Fill each muffin cup about two-thirds full with the batter.
- Bake in the preheated oven for approximately 25 minutes or until a toothpick inserted into the center of a pupcake comes out clean.
- Allow the pupcakes to cool completely.
7. Blueberry Biscuits
| Prep Time | Cook Time | Total Time |
|---|---|---|
| 15 minutes | 25 minutes | 40 minutes |
Blueberries are not only a human favorite but also a hit among dogs. These Blueberry Biscuits are packed with antioxidants and are incredibly simple to make. Mix blueberries, oats, a touch of honey, and whole wheat flour to create a dough. Roll out the dough and use cookie cutters to shape them into biscuits. Bake until they’re golden brown and let your pup enjoy these fruity delights.
We offer 24-hour dog boarding, drop-off and pick-up anytime.
Blueberry Biscuits Ingredients
| Ingredient | Quantity |
|---|---|
| Whole Wheat Flour | 1 1/2 cups |
| Oat Flour | 1/2 cup |
| Blueberries (fresh or frozen) | 1/2 cup |
| Unsweetened Applesauce | 1/4 cup |
| Water | 1/4 cup |
| Egg | 1 |
| Honey | 1 tablespoon |
| Plain Greek Yogurt (optional, for icing) | 1/4 cup |
Servings: Approximately 20-24 small biscuits
Nutritional Facts (per biscuit):
| Nutrient | Quantity |
|---|---|
| Calories | About 35 calories |
| Protein | 1.5g |
| Fat | 0.5g |
| Carbohydrates | 7g |
| Fiber | 1g |
Remember to consult with your veterinarian before introducing new treats into your dog’s diet, as individual dietary needs can vary depending on your dog’s size, breed, and health.
Blueberry Biscuits Instructions
- Preheat your oven to 350°F (175°C) and line a baking sheet with parchment paper.
- In a mixing bowl, combine the whole wheat flour and oat flour.
- In a separate small bowl, mash the blueberries. If you’re using frozen blueberries, allow them to thaw before mashing. You want a somewhat smooth consistency with small blueberry pieces.
- Add the mashed blueberries, unsweetened applesauce, water, egg, and honey to the dry ingredients. Mix well to form a dough. You may need to adjust the amount of water slightly if the dough is too dry or too sticky.
- Roll out the dough on a lightly floured surface to about 1/4-inch thickness.
- Use dog-themed cookie cutters or any shape you prefer to cut out the biscuits. Place them on the prepared baking sheet.
- Bake in the preheated oven for about 20-25 minutes, or until the biscuits turn golden brown and crisp.
- Allow the biscuits to cool completely on a wire rack.
- If you’d like, you can ice the biscuits with a small amount of plain Greek yogurt for added appeal. Make sure to let the icing set before serving.
- Store the blueberry dog biscuits in an airtight container in the refrigerator. They can be kept for up to two weeks.
8. Salmon Crunchies
| Prep Time | Cook Time | Total Time | Temperature |
|---|---|---|---|
| 15 minutes | 2 hours | 2 hours 15 minutes | 350°F (175°C) |
If your pup loves fish, they’ll devour these Salmon Crunchies. Rich in omega-3 fatty acids, these treats promote a shiny coat and support overall health. Combine canned salmon, whole wheat flour, a beaten egg, and a splash of water to form a dough. Roll out the dough, cut it into shapes, and bake until crispy. These treats are not only delicious but also provide a healthy boost to your dog’s diet.
Salmon Crunchies Ingredients:
| Ingredient | Quantity |
|---|---|
| Fresh or canned salmon | 1/2 cup |
| Whole wheat flour | 1 cup |
| Oat flour | 1 cup |
| Egg | 1 |
| Water | 1/4 cup |
Servings: Approximately 40-50 small treats
Nutritional Facts (per treat):
| Nutrient | Quantity |
|---|---|
| Calories | About 12 calories |
| Protein | 0.7g |
| Fat | 0.5g |
| Carbohydrates | 1.2g |
| Fiber | 0.2g |
Please remember to consult with your veterinarian before introducing these treats into your dog’s diet to ensure they are appropriate for your pet’s specific needs.
Salmon Crunchies Instructions
- Preheat your oven to 350°F (175°C).
- In a food processor, combine the fresh or canned salmon, whole wheat flour, oat flour, egg, and water. Process until the mixture forms a dough. If it’s too dry, add a bit more water.
- Roll out the dough on a floured surface to about 1/4-inch thickness.
- Use dog-themed cookie cutters or any shape you prefer to cut out the treats. Place them on a baking sheet lined with parchment paper.
- Bake in the preheated oven for about 20-25 minutes or until the treats are golden brown and crispy.
- Turn off the oven and leave the treats inside to cool completely. This can take an additional 1-2 hours.
- Once the treats are completely cool, store them in an airtight container in the refrigerator. They can be kept for up to two weeks.
9. Coconut Oil Delights
| Prep Time | Cook Time | Total Time | Temperature |
|---|---|---|---|
| 15 minutes | 20 minutes | 35 minutes | 350°F (175°C) |
Coconut oil offers numerous health benefits for dogs, and these Coconut Oil Delights are a tasty way to incorporate it into their diet. Mix coconut oil, peanut butter, whole wheat flour, and a touch of honey. Shape the dough into small balls or use cookie cutters for fun shapes. Bake until golden brown, and let your furry friend indulge in these flavorful and nourishing treats.
Learn more about our professional grooming services here.
Coconut Oil Delights Ingredients:
| Ingredient | Quantity |
|---|---|
| Coconut oil (unrefined) | 1/2 cup |
| Whole wheat flour | 1 cup |
| Rolled oats | 1/2 cup |
| Peanut butter (unsalted) | 1/4 cup |
| Water | 1/4 cup |
| Egg | 1 |
Servings: Approximately 20-24 small treats
Nutritional Facts (per treat):
| Nutrient | Quantity |
|---|---|
| Calories | About 60 calories |
| Protein | 1.5g |
| Fat | 4g |
| Carbohydrates | 4.5g |
| Fiber | 0.8g |
Please consult with your veterinarian before introducing these treats into your dog’s diet to ensure they are suitable for your pet’s specific dietary needs.
Coconut Oil Delights Instructions
- Preheat your oven to 350°F (175°C).
- In a microwave-safe bowl, melt the coconut oil in the microwave for about 30 seconds, or until it’s fully liquid.
- In a mixing bowl, combine the melted coconut oil, whole wheat flour, rolled oats, peanut butter, water, and egg. Mix well to form a dough. If the dough is too dry, add a bit more water.
- Roll out the dough on a floured surface to about 1/4-inch thickness.
- Use dog-themed cookie cutters or any shape you prefer to cut out the treats. Place them on a baking sheet lined with parchment paper.
- Bake in the preheated oven for about 15-20 minutes or until the treats are golden brown.
- Allow the treats to cool completely before serving.
- Store the Coconut Oil Delights in an airtight container in the refrigerator. They can be kept for up to two weeks.
10. Liver Popsicles
| Prep Time | Freezing Time | Total Time |
|---|---|---|
| 10 minutes | 4 hours or more | About 4 hours 10 minutes |
For those hot summer days, treat your furry friend to Liver Popsicles. Blend cooked liver, low-sodium chicken broth, and a splash of water until smooth. Pour the mixture into ice cube trays and freeze until solid. These frozen treats will help keep your dog cool and refreshed during the sweltering summer months.
Liver Popsicles Ingredients:
| Ingredient | Quantity |
|---|---|
| Chicken or beef liver | 1/2 pound (about 8 oz) |
| Water | 1/2 cup |
| Plain Greek yogurt | 1/4 cup |
| Fresh or frozen peas | 1/4 cup |
Servings: Approximately 6-8 popsicles
Nutritional Facts (per popsicle):
| Nutrient | Quantity |
|---|---|
| Calories | About 40 calories |
| Protein | 3g |
| Fat | 2g |
| Carbohydrates | 2g |
| Fiber | 0.5g |
Remember to consult with your veterinarian before introducing these treats into your dog’s diet to ensure they are appropriate for your pet’s specific dietary needs.
Liver Popsicles Instructions
- In a medium-sized saucepan, combine the chicken or beef liver and water.
- Bring the mixture to a boil, then reduce the heat to low, cover, and simmer for about 10 minutes or until the liver is fully cooked.
- Remove the liver from the saucepan and allow it to cool.
- Once the liver has cooled, cut it into small pieces.
- In a blender or food processor, combine the cooked liver pieces, plain Greek yogurt, and peas. Blend until the mixture is smooth and well combined.
- Pour the liver mixture into popsicle molds or ice cube trays.
- Insert popsicle sticks into each mold or ice cube compartment.
- Place the molds or trays in the freezer and let them freeze for at least 4 hours or until they are solid.
- Once frozen, remove the liver popsicles from the molds or trays and serve to your dog as a refreshing treat on a hot day.
- Store any leftover liver popsicles in an airtight container in the freezer for future use.
Bottom Line
From Peanut Butter Banana Bites to Liver Popsicles, these recipes are not only delicious but also made with love. So, grab your apron, gather the ingredients, and let the baking adventure begin. Your furry friend will thank you with slobbery kisses and a wagging tail, guaranteed.
At 24 Hour Dog Daycare, we prioritize the well-being of dogs in our care, with spacious play areas and private suites. Our trained staff is attentive to every dog’s body language and signals, ensuring a safe and happy environment.
Need a doggy daycare? Make a reservation with us today. Your furry friend will be happiest in our care.
FAQs
1. Are homemade dog treats healthier than store-bought options?
Homemade dog treats can be a healthier choice compared to store-bought options because you have control over the ingredients. You can avoid additives, preservatives, and excessive amounts of salt or sugar. By using wholesome and nutritious ingredients, you can ensure that your furry friend is getting a treat that promotes their overall well-being.
2. Can I customize homemade dog treats for specific dietary needs?
Absolutely! One of the benefits of making homemade dog treats is the ability to customize them to suit your dog’s specific dietary needs. Whether your dog has allergies, sensitivities, or requires a special diet, you can choose ingredients that cater to those requirements.
For example, you can use alternative flours like coconut or almond flour for dogs with grain allergies or substitute ingredients to accommodate dietary restrictions.
3. How should homemade dog treats be stored?
To maintain freshness and prevent spoilage, it’s important to store homemade dog treats properly. Once the treats have cooled completely, store them in an airtight container or ziplock bag. Keep them in a cool, dry place, away from direct sunlight.
If you live in a humid environment, you may want to refrigerate or freeze the treats to extend their shelf life. Remember to label the container with the treat name and date of preparation for easy reference.
4. Can homemade dog treats help with training?
Absolutely! Homemade dog treats can be a fantastic tool for training and positive reinforcement. Dogs are highly motivated by food, and using homemade treats as rewards can make training sessions more enjoyable and effective.
The key is to choose small, bite-sized treats that are easy for your dog to consume quickly, allowing for swift reinforcement during training exercises.
5. Are there any ingredients I should avoid when making homemade dog treats?
Yes, there are a few ingredients that should be avoided when making homemade dog treats. Common culprits include chocolate, onions, garlic, grapes, raisins, and artificial sweeteners like xylitol, as these can be toxic to dogs.
Additionally, be cautious with ingredients high in fat, as excessive fat intake can lead to digestive issues. Always do your research and consult with your veterinarian if you’re unsure about the safety of certain ingredients.